
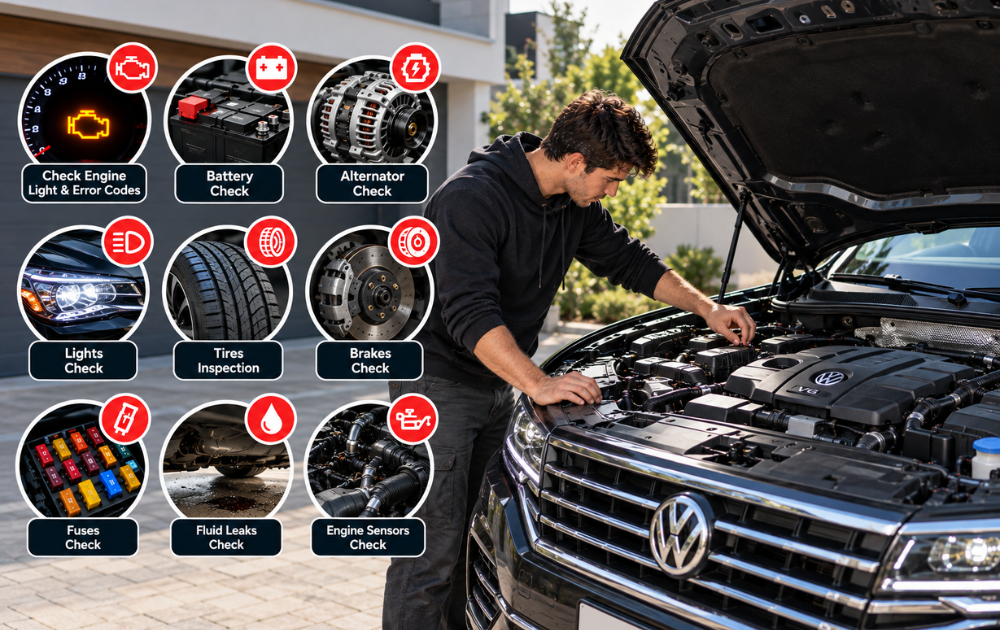
Free Car Diagnostics: A Complete Guide to DIY Car Checks
What you’ll learn
How to Diagnose Your Car for Free: A Complete DIY Guide
Free car diagnostics can help you understand what’s wrong with your vehicle before you spend money on a professional diagnostic service. You don’t always need specialized equipment to identify common problems or determine what should be checked first.
Many common vehicle problems can be investigated at home using simple visual inspections, your vehicle’s dashboard information, your owner’s manual, and ” if available ” an OBD-II scanner.
A professional diagnostic service uses specialized scanners, live data, electrical testing equipment, pressure gauges, oscilloscopes, smoke machines, and mechanical testing procedures. However, there are several useful diagnostic checks you can perform yourself for free before spending money on a repair.
The goal isn’t to replace a professional mechanic. Instead, a good DIY diagnostic can help you answer three important questions:
- What is the car telling me?
- What should I check first?
- Is this something I can safely handle myself, or does it require professional diagnosis?
Let’s go through the most useful free diagnostic checks you can perform yourself.
1. Check the Dashboard Warning Lights
The first diagnostic tool already installed in your vehicle is the dashboard.
Before doing anything else, turn the ignition on and look at the warning lights.
Depending on the vehicle, you may see:
- Check Engine Light
- Battery/charging warning
- Oil pressure warning
- Engine temperature warning
- ABS warning
- Tire-pressure warning
- Airbag/SRS warning
- Traction-control warning
- Electronic stability control warning
Don’t simply ignore a warning because the car still drives normally.
For example, the Check Engine Light is connected to the vehicle’s onboard diagnostic system. OBD-II monitors various vehicle systems, including the engine and emissions systems, and can store diagnostic information when a fault is detected.
Pay Attention to Whether the Light Is Steady or Flashing
A steady warning light and a flashing warning light can represent very different situations.
If a warning light is accompanied by serious symptoms such as overheating, loss of braking, severe engine misfire, smoke, unusual noises, or loss of control, don’t continue driving simply to complete a DIY diagnostic.
Safety comes before diagnosis.
2. Read the Check Engine Light With an OBD-II Scanner
This is one of the most useful DIY diagnostic methods.
If your vehicle supports OBD-II, you can connect an OBD-II scanner to the diagnostic port and read the stored Diagnostic Trouble Codes (DTCs).
The scanner may return codes such as:
- P0300 — Random/multiple-cylinder misfire
- P0171 — System too lean
- P0420 — Catalytic-converter efficiency below threshold
- P0455 — EVAP system leak
- P0128 — Coolant-temperature regulation issue
But here’s the important part:
An OBD code is not necessarily a diagnosis.
If your scanner reports an oxygen-sensor-related code, for example, that doesn’t automatically mean the oxygen sensor itself needs to be replaced.
The underlying problem could involve wiring, connectors, an exhaust leak, the fuel mixture, another sensor, or another condition causing the computer to detect abnormal readings.
A free scan should therefore be treated as evidence and a starting point—not a repair order.
What to Do After Getting a Code
Write down:
- The exact code
- Whether it is stored, pending, or permanent, if your scanner provides that information
- The vehicle’s mileage
- Current symptoms
- When the warning appeared
- Any recent repairs
- Whether the vehicle drives differently
Then research the code and investigate its possible causes before buying any parts.
3. Check Your Car Battery
A weak battery can create some very confusing symptoms.
You might notice:
- Slow engine cranking
- Clicking when starting
- Dim interior lights
- Electronics behaving strangely
- Difficulty starting after the car has been sitting
- A repeated need for a jump start
You can perform a basic inspection without any equipment.
Look at the Battery
With the engine off, check for:
- Corrosion around the terminals
- Loose connections
- Damaged cables
- Swelling or physical damage
- Signs of leakage
Do not touch or attempt to test a damaged, leaking, swollen, or otherwise unsafe battery.
If you own a digital multimeter, you can go further and measure the battery voltage. A proper battery evaluation can involve resting voltage, cranking voltage, and charging-system measurements rather than relying on a single voltage reading.
4. Check Whether the Alternator Is Charging
The battery isn’t the only part of the starting and charging system.
The alternator supplies electrical power and recharges the battery while the engine is running.
Possible symptoms of a charging problem include:
- Battery warning light
- Repeatedly dead battery
- Dimming or flickering lights
- Electrical problems while driving
- The vehicle starting after a jump but later losing power
If you don’t own diagnostic equipment, you may be able to have the battery and charging system tested at a suitable automotive service location.
5. Check Your Engine Oil
You don’t need a diagnostic scanner to detect an obvious oil problem.
Park the vehicle safely on level ground and follow the procedure in the owner’s manual for checking the engine oil.
Look at:
- Oil level
- Oil appearance
- Signs of contamination
- Possible leaks around the engine
A low oil level doesn’t automatically tell you why the oil is low.
The engine could be:
- Leaking externally
- Burning oil
- Consuming oil because of an internal problem
- Simply overdue for an oil service
So don’t stop at:
“The oil is low.”
Ask the next question:
Where did the oil go?
6. Check the Coolant Level
An overheating engine can become an expensive problem very quickly.
When the engine is completely cold, inspect the coolant reservoir and compare the level with the markings.
Look for:
- Low coolant
- Visible leaks
- Cracked hoses
- A damaged reservoir
- Unusual coolant color or contamination
Never Open a Hot Cooling System
Coolant systems can be pressurized when hot, and opening the cap can cause serious burns.
If the coolant level repeatedly drops, simply adding more coolant isn’t a diagnosis. You need to determine where the coolant is going.
7. Inspect the Tires
Your tires are one of the easiest parts of your vehicle to inspect yourself.
Check:
- Tire pressure
- Tread depth
- Uneven wear
- Cracks
- Bulges
- Nails or other visible objects
- Damage to the sidewalls
Compare the tire pressure with the manufacturer’s recommended pressure, which is normally found on the vehicle’s information label. Don’t simply use the maximum pressure printed on the tire’s sidewall.
Uneven tread wear can also provide useful clues.
For example:
- Wear on one edge may suggest an alignment or suspension issue.
- Wear in the center can be associated with excessive inflation.
- Wear on both edges can be associated with underinflation.
These observations don’t prove the cause, but they can indicate where further inspection may be needed.
8. Listen to Your Car
Your ears can be a surprisingly useful diagnostic tool.
Pay attention to noises that weren’t there before.
Common Examples
Clicking when turning:
Could indicate a problem in the CV joint or axle area.
Grinding while braking:
May indicate severe brake wear or another brake problem.
Squealing from the engine bay:
Could involve a belt, pulley, or another rotating component.
Knocking from the engine:
Can indicate a potentially serious engine problem.
Humming that changes with vehicle speed:
Could be related to the tires, wheel bearings, or drivetrain components.
The important word is could.
Noise alone usually isn’t enough to identify a failed component with certainty.
9. Pay Attention to How the Car Drives
Your driving experience is another valuable source of diagnostic information.
Ask yourself:
- Does the engine idle smoothly?
- Does the car hesitate during acceleration?
- Does it pull to one side?
- Does it vibrate at certain speeds?
- Does it shift smoothly?
- Does the steering feel different?
- Does the brake pedal feel normal?
- Does the engine lose power?
- Does the car stall?
Try to identify when the problem occurs.
For example:
“The car vibrates.”
isn’t very specific.
But:
“The car vibrates only when braking from 80 km/h.”
is much more useful information.
The more precisely you can describe the symptom, the easier it becomes to narrow down the possible causes.
10. Check Your Lights
This simple test takes only a few minutes.
Check:
- Headlights
- High beams
- Brake lights
- Turn signals
- Hazard lights
- Reverse lights
- Fog lights
- License-plate lights
A failed bulb may be obvious, but electrical problems can sometimes involve fuses, wiring, connectors, or control modules.
Don’t assume that replacing the bulb will always solve the problem.
11. Check the Fuses
If an electrical component suddenly stops working, checking the appropriate fuse can be a sensible first step.
Your owner’s manual should show the location of the fuse boxes and identify the circuits.
If you find a blown fuse, replace it only with the correct type and rating specified by the manufacturer.
Never Install a Higher-Rated Fuse
A repeatedly blown fuse can indicate an underlying electrical problem.
Replacing it with a higher-rated fuse can create a serious wiring or fire hazard.
12. Look for Visible Leaks
After the vehicle has been parked for a while, look underneath it for unusual fluid.
Different fluids can have different colors, textures, and locations. However, color alone is not a reliable way to identify a fluid because fluids can become dirty or vary between vehicles.
Potential leaks can involve:
- Engine oil
- Coolant
- Brake fluid
- Transmission fluid
- Power-steering fluid on vehicles that use hydraulic power steering
- Fuel
- Washer fluid
If you notice a fuel leak or a significant brake-fluid leak, don’t treat it as a minor DIY issue.
13. Check the Air Filter
A dirty engine air filter can restrict airflow, depending on the vehicle and the condition of the filter.
If the air filter is easily accessible, inspect it according to the manufacturer’s service procedure.
However, don’t automatically assume:
“Dirty filter = bad engine performance.”
Modern engines use sophisticated air/fuel management, and poor performance can have many causes.
The air filter is simply one component to inspect.
14. Check for Loose or Disconnected Connections
If a problem started immediately after maintenance or another repair, inspect the areas that were recently worked on.
Look for obvious issues such as:
- Disconnected electrical connectors
- Loose intake hoses
- Loose battery terminals
- Unsecured vacuum lines
- Missing clips
- Damaged wiring
This is particularly useful after replacing an air filter, battery, spark plugs, sensors, or other components.
Again, only inspect components that are safely accessible with the engine off.
15. Use Your Car’s Owner’s Manual as a Diagnostic Tool
Your owner’s manual is one of the most useful free resources available to you.
It can tell you:
- Recommended fluid specifications
- Tire pressures
- Fuse locations
- Warning-light meanings
- Maintenance intervals
- Correct oil specifications
- Battery information
- Towing information
- Reset procedures
- Recommended inspection procedures
Don’t rely on a generic internet recommendation when your manufacturer’s documentation provides a vehicle-specific specification.
Free DIY Diagnostics vs. Professional Diagnostics
Here’s where many DIY guides get this wrong.
A free diagnostic can be extremely useful, but it is not equivalent to a professional diagnostic session.
| Free DIY Check | Professional Diagnostic |
|---|---|
| Read basic OBD-II codes | Advanced diagnostic scanning |
| Inspect fluids | Fluid-pressure and system testing |
| Check battery condition | Battery and charging-system analysis |
| Inspect tires | Alignment and suspension diagnosis |
| Listen for noises | Mechanical testing and road testing |
| Inspect visible leaks | Pressure and smoke testing |
| Check fuses | Electrical circuit testing |
| Observe symptoms | Live-data analysis |
| Perform a visual inspection | Component-level diagnosis |
A professional technician may use live engine data, electrical testing, pressure testing, specialized scan tools, and manufacturer-specific procedures to confirm the actual cause.
So the objective of DIY diagnostics isn’t necessarily:
“Fix everything without a mechanic.”
A better objective is:
“Understand the problem before spending money.”
What You Should Not Diagnose Yourself
There are situations where continuing to experiment isn’t worth the risk.
Get professional help when you have:
- Severe overheating
- Loss of braking
- Loss of steering control
- Fuel leakage
- Significant oil-pressure problems
- Severe engine knocking
- Major transmission problems
- Airbag/SRS faults
- High-voltage hybrid or EV system problems
- Serious electrical faults
- Repeated engine misfires
- A flashing Check Engine Light accompanied by severe symptoms
A diagnostic code can tell you where to investigate, but some problems require equipment and procedures that aren’t appropriate for a home inspection.
The Biggest DIY Diagnostic Mistake
The biggest mistake is replacing a part simply because a diagnostic code mentions it.
Imagine your scanner displays a code associated with an oxygen sensor.
It’s tempting to search for the sensor, order one, and replace it immediately.
But the actual problem could be:
- Wiring
- A connector
- An exhaust leak
- Fuel-mixture problems
- A vacuum leak
- Another sensor
- An engine problem
- An issue elsewhere in the system
Professional diagnosis is fundamentally about testing the possible causes until the actual cause is confirmed.
That’s why a code reader is a diagnostic tool not a crystal ball.